Drainage Pipe Installation: A Contractor's Field Guide to Trenching, Bedding, and Backfill
In November 2023, a contractor in the Middle East installed a DN1200mm stormwater line beneath a new industrial park. The pipe was rated for the load. The trench was straight. But six months after backfill, laser profiling showed more than 6% vertical deflection at multiple joints. The cause was not the pipe. The bedding layer had been placed in frozen lifts, and the haunch zone was not compacted to the specified 95% standard Proctor density. The remediation cost exceeded the original installation contract.
If you install municipal drainage pipe, sewer pipe, or stormwater pipe, you know that the pipe itself is only part of the system. Drainage pipe installation determines whether the line performs for 50 years or fails within the first rainy season. The trench, the bedding, the backfill, and the jointing matter as much as the pipe wall.
In this guide, you will learn the complete drainage pipe installation workflow from site preparation and trenching to bedding, laying, backfill, and testing. You will also see how large-diameter HDPE/PP spiral profile pipe simplifies installation logistics and how Yongke Machinery supports contractors who produce pipe on-site.
What Is Drainage Pipe Installation?
Drainage pipe installation is the field process of placing, joining, supporting, and testing pipes that convey stormwater, sewage, or industrial drainage. The work includes excavation, soil preparation, pipe bedding, pipe laying, joint assembly, backfill compaction, and post-installation testing for any drainage pipe installation project.
A complete drainage pipe installation project covers:
Site survey, utility location, and soil classification
Trench design including width, depth, slope, and shoring
Pipe bedding selection and placement
Pipe handling, lowering, and alignment
Joint assembly and leak testing
Backfill in controlled lifts with proper compaction
Surface restoration and as-built documentation
The goal is to create a structurally supported conduit that maintains grade, capacity, and integrity under soil loads, traffic loads, and internal pressure or vacuum where applicable.
Engineering Note: Pipe deflection in flexible pipe systems is controlled mainly by the soil-pipe interaction, not by pipe wall thickness alone. A high-quality pipe installed on poor bedding will perform worse than a standard pipe installed on well-compacted, granular bedding.
Why Drainage Pipe Installation Quality Matters
Most pipe failures in the first 10 years of service are not material failures. They are installation failures. Improper bedding, inadequate compaction, poor jointing, and uncontrolled trench widths create stress concentrations that exceed design limits in any drainage pipe installation.
The Real Cost of Poor Installation
Failures in drainage pipe installation lead to:
Excessive deflection and reduced hydraulic capacity
Joint leakage and infiltration or exfiltration
Settlement and surface cracking above the trench
Sinkholes caused by soil migration into the pipe
Premature pipe replacement and traffic disruption
Warranty claims and reputational damage for contractors
The American Society of Civil Engineers and water infrastructure groups consistently report that installation quality is a stronger predictor of buried pipe performance than pipe material alone.
Designing for Installation Success
Successful drainage pipe installation starts before the first bucket of soil is moved. Contractors must understand:
Native soil type and bearing capacity
Groundwater conditions and dewatering needs
Traffic and construction loads during and after installation
Pipe stiffness class and manufacturer installation guidelines
Local standards such as ASTM D2321 for underground installation of thermoplastic pipe
Required compaction methods and testing frequency
When these factors are addressed in the installation plan, the pipe performs as designed.
Pre-Installation Planning for Drainage Pipe Projects
Every drainage pipe installation project begins with preparation. Skipping this phase causes delays, change orders, and quality problems during construction.
Site Survey and Utility Clearance
Before excavation, verify the horizontal and vertical location of existing utilities. Water mains, gas lines, electrical ducts, and communication cables often share corridors with municipal drainage pipe. One strike can halt the drainage pipe installation project and create safety hazards.
The survey should also confirm:
Existing ground elevation and trench invert levels
Access routes for pipe delivery and equipment
Location of manholes, catch basins, and outfalls
Soil conditions along the alignment
Proximity to structures that could be affected by vibration or settlement
Soil Classification and Bedding Design
Soil type determines bedding requirements. Granular soils with good drainage need less engineered bedding than cohesive clays or organic soils. A geotechnical report should classify soils and recommend:
Bedding material gradation
Compaction requirements
Trench width and slope stability measures
Dewatering methods if groundwater is present
For flexible thermoplastic pipe such as HDPE drainage pipe, the envelope of compacted soil around the pipe provides most of the structural support. Bedding and backfill design is therefore a structural design task in HDPE pipe installation, not just a construction detail.
Material Delivery and Storage
Large-diameter pipe delivery requires planning. DN1200mm and larger pipes may need special transport and lifting equipment. Pipes should be stored on level ground with proper blocking to prevent rolling, ovalization, or UV exposure.
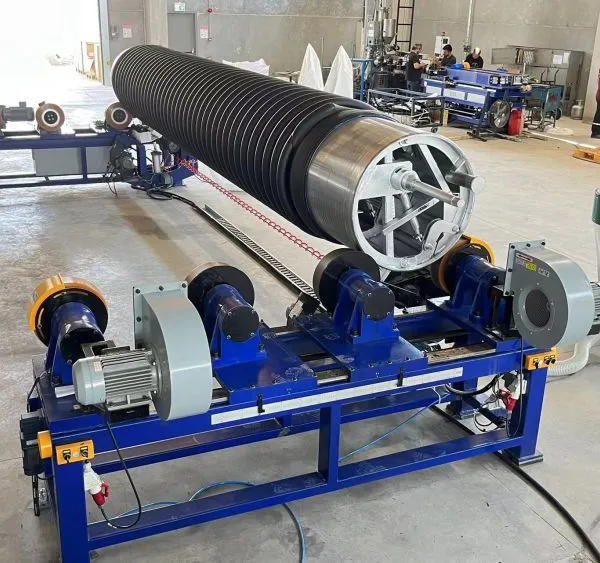
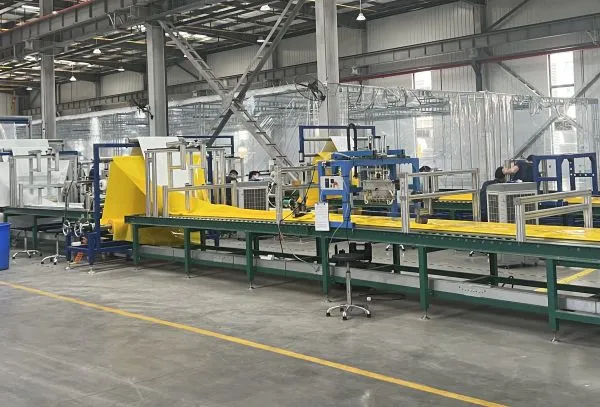
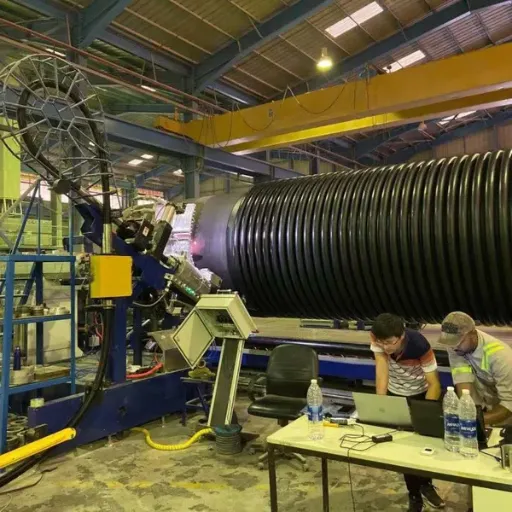
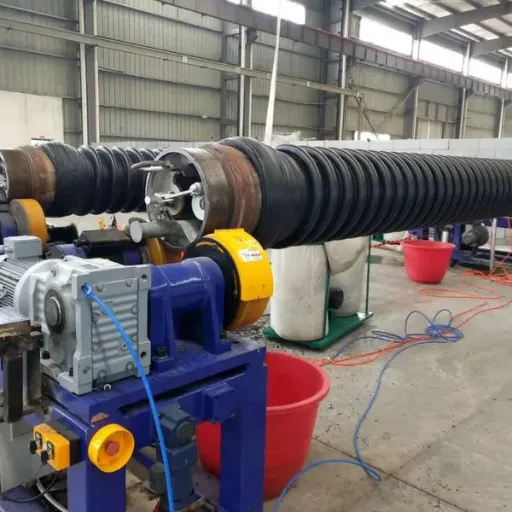
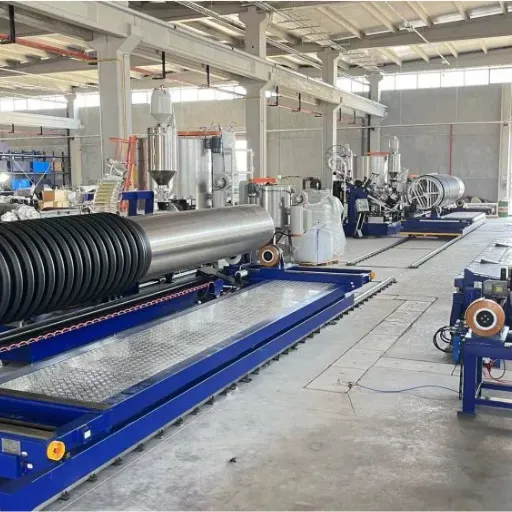
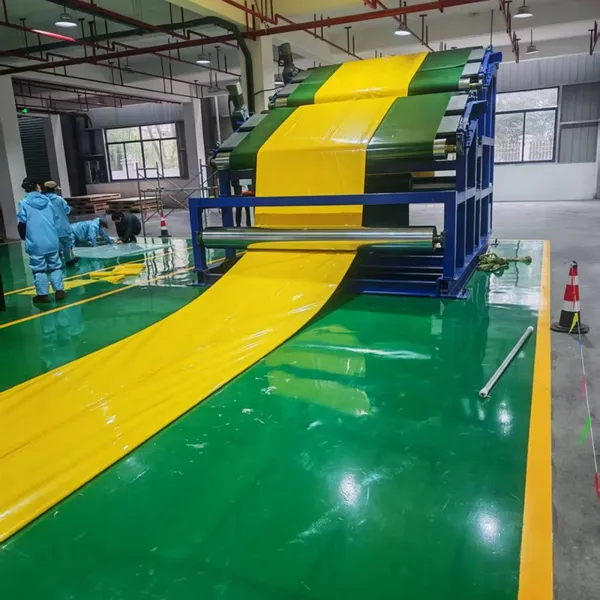
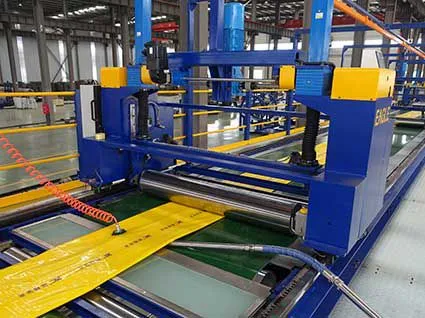
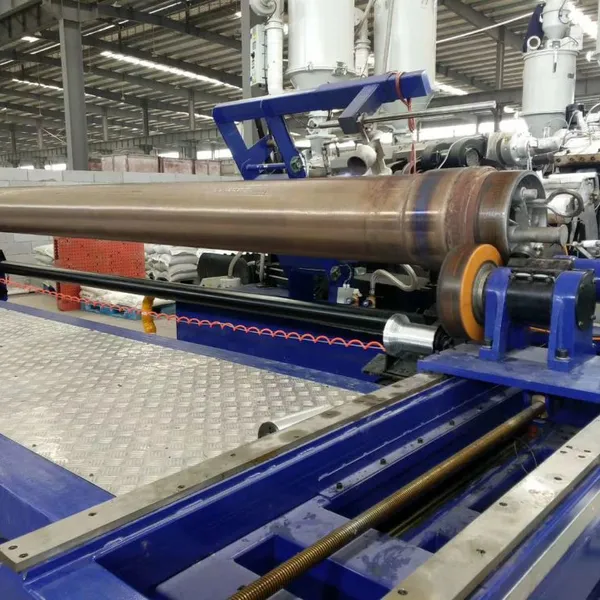
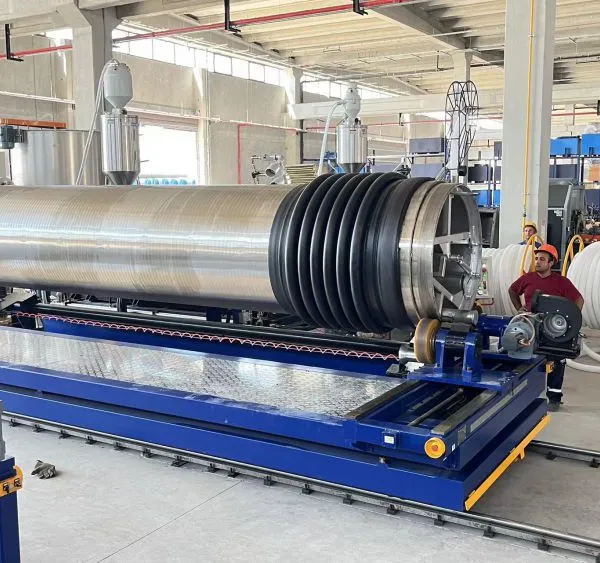
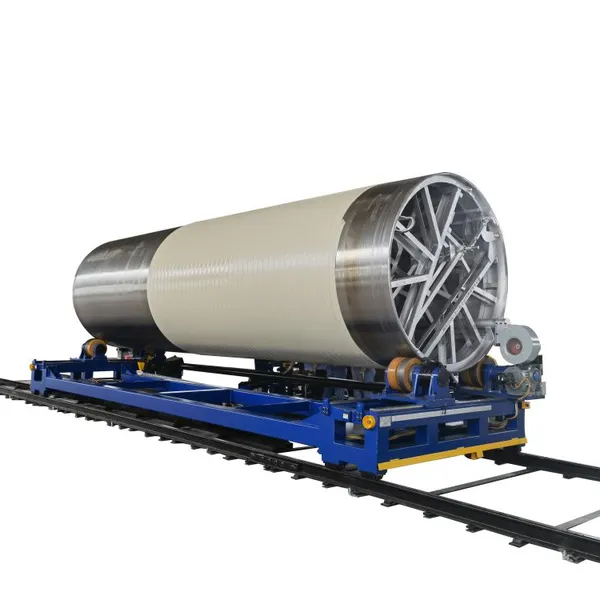
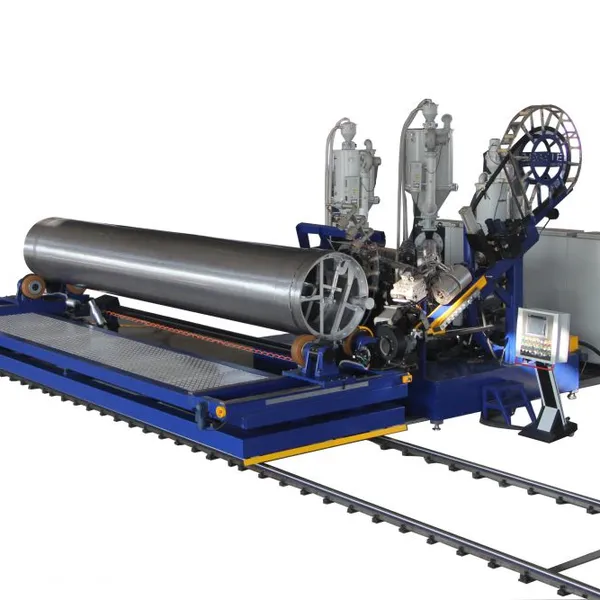
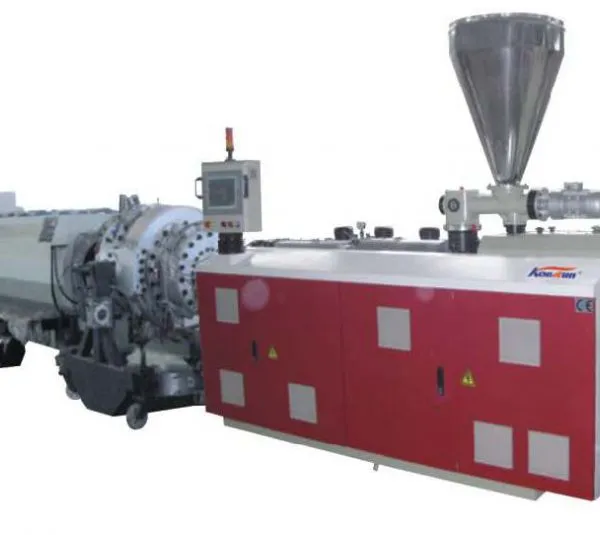
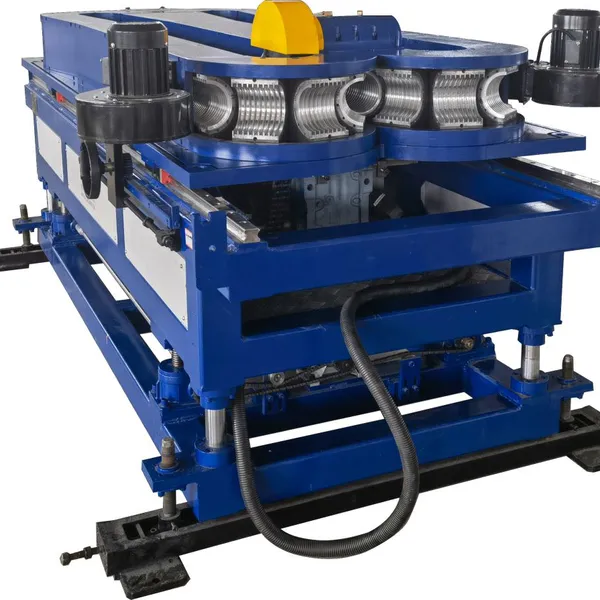
Contractors who produce HDPE/PP spiral profile pipe on-site eliminate many delivery and handling risks. A HDPE/PP spiral profile pipe machine allows continuous production of pipe lengths matching the trench layout, reducing joints and transportation complexity for large diameter pipe installation projects.
Trench Excavation for Drainage Pipe Installation
The trench is the foundation of the installation. Its dimensions, stability, and bottom condition directly affect pipe performance.
Trench Width and Depth
Trench width should be the minimum practical that allows proper placement, jointing, and compaction. Excess width increases backfill volume, compaction effort, and surface settlement after drainage pipe installation. Typical trench width is pipe outside diameter plus 400-600mm on each side, but always follow the project specification and manufacturer guidelines.
Trench depth is governed by:
Required cover depth for traffic and frost protection
Pipe slope and invert elevation
Existing utility crossings
Structural loading from roads or structures above
Minimum cover for vehicular traffic is often 0.9-1.2 meters for thermoplastic pipe, but local standards vary. Stormwater pipe installation in cold climates may require additional cover for frost protection.
Trench Bottom Preparation
The trench bottom must be stable, reasonably flat, and free of large stones, debris, or frozen material. For flexible pipe, the bottom should allow the pipe to rest uniformly along its barrel, with small hollows excavated at joints if bell holes are required.
Over-excavation should be backfilled with bedding material and compacted. Soft or unstable trench bottoms may require stabilization with geotextile, granular fill, or soil replacement.
Dewatering and Shoring
Groundwater must be controlled during drainage pipe installation. Pumping should lower the water table below the trench bottom to prevent flotation of empty pipe, washout of bedding, and unstable sidewalls. This is especially important for stormwater pipe installation in areas with high seasonal groundwater.
Trench shoring protects workers and prevents sidewall collapse in unstable soils. Shoring systems must not restrict access for bedding placement, pipe laying, or compaction equipment.
Bedding, Haunching, and Backfill: The Structural Envelope
The soil envelope around a buried pipe carries most of the external load. Proper placement of bedding, haunch, and backfill is the single most important factor in long-term drainage pipe installation performance.
Pipe Bedding Layer
Bedding is the layer of granular material placed on the prepared trench bottom before pipe placement. It provides a uniform support surface and helps distribute loads.
Common bedding materials include:
Crushed stone or gravel with limited fines
Sand with appropriate gradation
Flowable fill for difficult access or unstable soils
Bedding thickness is typically 100-150mm below the pipe barrel. The material should be placed in uniform layers and lightly compacted before the pipe is set.
Haunch Zone Compaction
The haunch zone is the soil beneath the pipe springline and around the lower sides. This zone carries a large share of the vertical load transferred through the pipe wall. Inadequate haunch compaction is the most common cause of excessive flexible pipe deflection.
Haunch material should be placed in thin lifts, typically 100-150mm, and compacted to the specified density during drainage pipe installation. Hand-operated or small vibratory compaction equipment is often required because of limited space beside the pipe.
Initial and Final Backfill
Initial backfill extends from the haunch zone to a level above the pipe, usually 150-300mm above the crown. This layer protects the pipe during final backfill placement and must be placed without large stones or frozen lumps.
Final backfill returns the trench to finished grade. It may use excavated material if it meets gradation and compaction requirements. Compaction should be in controlled lifts to achieve the specified density without damaging the pipe.
Laying and Joining Large-Diameter Drainage Pipe
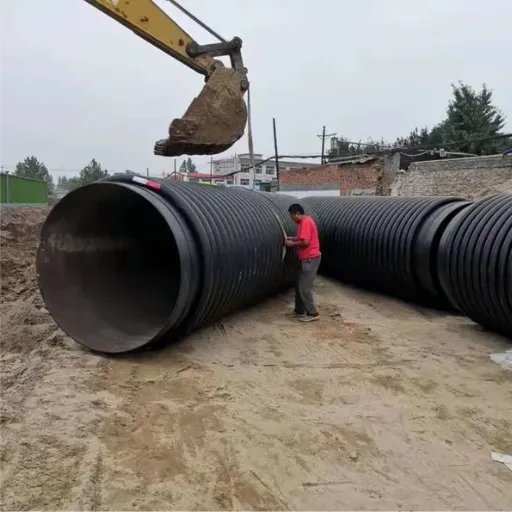
Once the trench and bedding are prepared, the pipe can be placed, aligned, and joined. Large diameter pipe installation requires careful handling because pipe weight, joint engagement, and alignment tolerances become more critical as diameter increases. Proper sequencing is essential for efficient drainage pipe installation in constrained urban corridors.
Pipe Handling and Lowering
Pipes should be lifted with slings or approved lifting devices, never dragged or dropped. For DN1200mm and larger pipes, excavators with padded slings or vacuum lifters are common. The pipe should be lowered evenly into the trench and positioned on the bedding without striking the trench walls or bedding material. This step is critical in HDPE pipe installation because the pipe wall is flexible until the soil envelope is complete.
For HDPE/PP spiral profile pipe, the pipe is often produced in long continuous lengths on-site. This reduces the number of joints and the handling operations required during HDPE pipe installation.
Alignment and Grade
Pipe alignment must follow the design grade. Laser levels, grade poles, or GPS-guided equipment help maintain invert elevation and slope. Each pipe section should be checked before backfill because correction after burial is expensive.
Grade tolerances depend on project requirements, but a typical tolerance is plus or minus 10mm over a 3-meter length. Stormwater and sewer pipe installation often require tighter grade control than general drainage.
Joint Assembly
Joint type depends on pipe material:
Bell-and-spigot with gasket: Common for concrete, PVC, and corrugated HDPE pipe
Heat-fusion or extrusion welding: Used for HDPE and PP pipe, including spiral profile stormwater pipe
Flanged or mechanical couplings: Used for repair sections or transitions
Joints should be clean, properly lubricated if required, and fully engaged. For gasketed joints, the gasket position and insertion depth must match manufacturer requirements. For welded joints, qualified welders and proper temperature control are essential.
Large-Diameter Pipe Considerations
Large diameter pipe installation presents specific challenges:
Higher pipe weight and lifting requirements
Greater sensitivity to bedding uniformity
More haunch material to place and compact
Larger trench widths and more spoil to manage
Longer jointing times, especially for welded systems
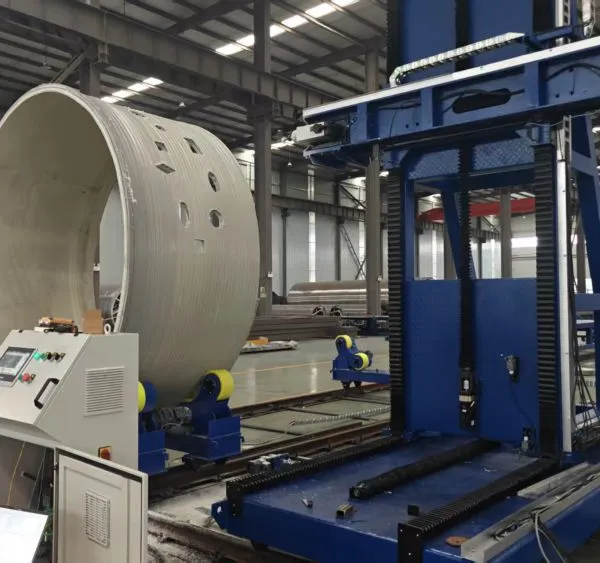
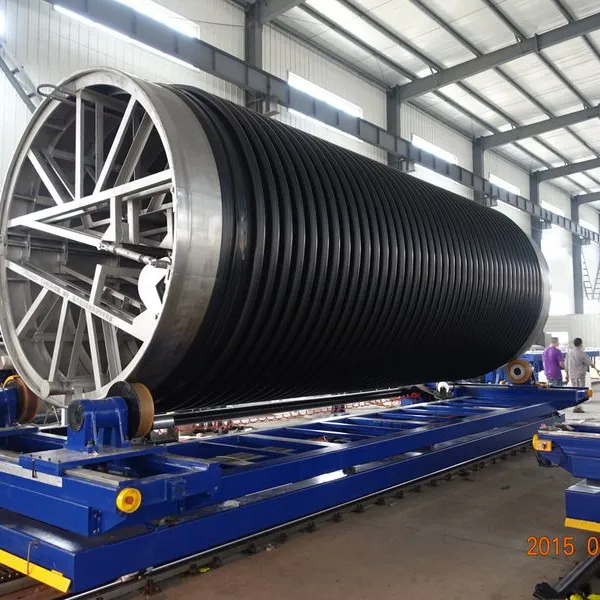
Spiral profile pipe addresses several of these challenges. DN300mm to DN5000mm pipes can be manufactured with heat-fusion welded joints in long lengths, reducing joint count. The lightweight nature of HDPE/PP compared to concrete also reduces lifting equipment requirements for large diameter pipe installation.
Testing and Commissioning After Drainage Pipe Installation
Testing verifies that the installed line meets design requirements before final acceptance. The most common tests are deflection testing, leakage testing, and visual inspection.
Deflection Testing
Flexible pipe deflection is measured with a mandrel, laser profiler, or CCTV survey. Common acceptance limits are 5% vertical deflection for thermoplastic pipe, though some specifications allow up to 7.5%. Deflection testing is usually performed 30 days or more after backfill to allow soil settlement.
Excessive deflection indicates poor bedding, inadequate haunch compaction, or overburden loads exceeding design assumptions.
Leakage Testing
Gravity sewers and stormwater lines are often tested with low-pressure air or water exfiltration tests. Sewer pipe installation specifications usually define allowable leakage per unit length. The line is plugged, pressurized or filled, and the pressure loss or leakage rate is measured against acceptance criteria.
For pressure pipe applications, hydrostatic testing confirms joint integrity and pipe strength. Test pressure and duration follow project specifications or standards such as AWWA M23.
CCTV Inspection
Closed-circuit television inspection identifies joint misalignment, cracks, debris, infiltration, or construction damage. CCTV is standard practice for sewer pipe installation and stormwater pipe installation, and is increasingly used for large lines after drainage pipe installation is complete.
Common Mistakes in Drainage Pipe Installation
Even experienced crews make errors. Recognizing common mistakes in drainage pipe installation helps prevent costly rework.
1. Inadequate Bedding Preparation
Placing pipe directly on native soil without proper bedding creates point loads and uneven settlement. Always place and compact a uniform bedding layer before pipe placement.
2. Poor Haunch Compaction
Leaving voids in the haunch zone is the leading cause of flexible pipe deflection. Use small compaction equipment and place material in thin lifts beside the pipe.
3. Over-Wide Trenches
Trenches wider than necessary increase backfill volume and reduce side support. Keep trench width to the minimum compatible with safe working and compaction access.
4. Frozen or Unsuitable Backfill
Frozen lumps, organic material, large stones, and debris do not provide stable support. Backfill material should be free of lumps larger than 75-100mm and free of frozen material.
5. Ignoring Manufacturer Installation Guidelines
Each pipe material and profile has specific installation requirements. HDPE pipe installation differs from concrete pipe installation in bedding, allowable deflection, and jointing. For a comparison of pipe types, see our guide on spiral profile pipe vs double wall corrugated pipe. Follow manufacturer guidelines and project specifications.
6. Inadequate Dewatering
Working in waterlogged trenches leads to poor compaction, unstable sidewalls, and flotation of empty pipe. Dewatering must be maintained until backfill is complete above the pipe crown for any drainage pipe installation.
Project Example: A municipal contractor in Eastern Europe replaced a failing concrete sewer line with DN1600mm HDPE spiral profile pipe. The original line had suffered joint displacement and root intrusion. The new pipe was installed with a 200mm crushed-stone bedding layer, 95% haunch compaction, and heat-fusion welded joints. Post-installation deflection testing showed 2.3% vertical deflection, well below the 5% limit. The project finished two weeks ahead of schedule because on-site pipe production eliminated delivery delays.
How On-Site Pipe Production Supports Drainage Pipe Installation
For large municipal drainage pipe projects, producing pipe on-site can transform installation logistics. This approach is particularly valuable for municipal infrastructure contractors managing large diameter pipe installation where transportation of long pipe sections is difficult and expensive.
Reducing Transportation and Handling
Large-diameter HDPE/PP spiral profile pipe can be produced continuously at the project site. This eliminates the need to transport pipe from a factory, reduces loading and unloading operations, and minimizes on-site storage requirements.
Matching Pipe Lengths to Trench Layout
On-site production allows pipe lengths to match the actual trench alignment. Fewer joints mean faster jointing, fewer potential leak points, and better hydraulic performance.
Faster Response to Design Changes
If the as-built trench length differs from the design or if additional pipe is needed, the production line can respond quickly. This flexibility reduces downtime during drainage pipe installation and avoids costly expedited deliveries.
Quality Control at the Site
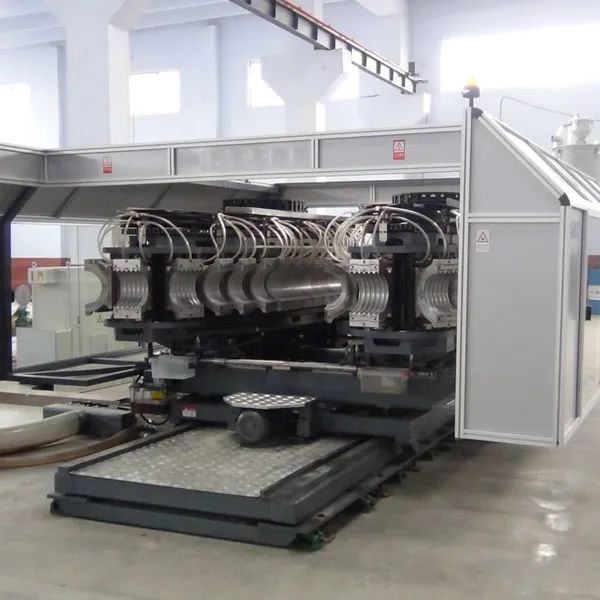
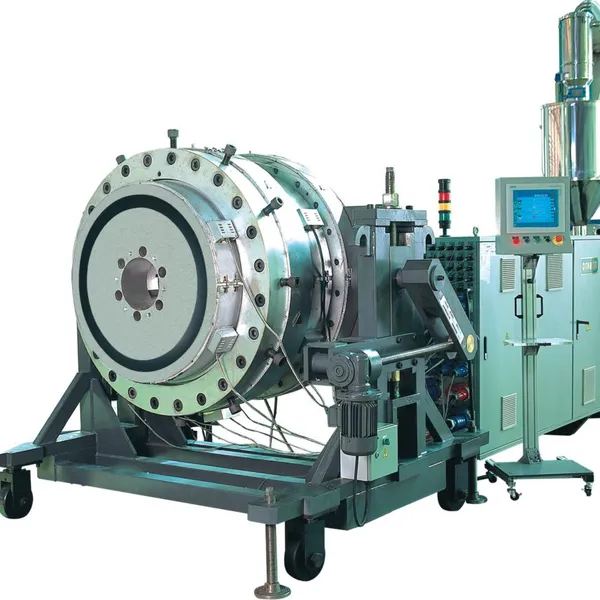
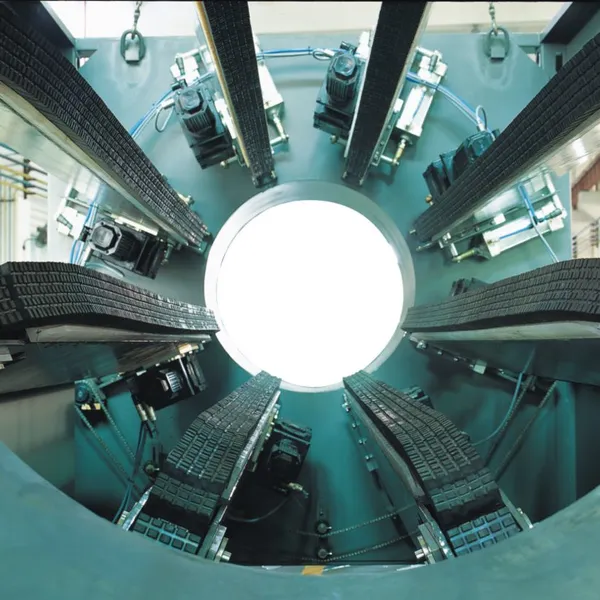
On-site production does not mean lower quality. Modern HDPE/PP spiral profile pipe machines include extrusion control, profile welding monitoring, cutting automation, and ring stiffness testing. Yongke Machinery provides installation and commissioning support to ensure the production line operates correctly before drainage pipe installation begins. For guidance on selecting equipment, see our article on choosing a pipe machinery manufacturer.
Practical Workflow for Drainage Pipe Installation
Here is how experienced contractors execute drainage pipe installation from mobilization to handover. Following this sequence reduces rework and keeps large-diameter projects on schedule.
Mobilize and survey. Set up site access, confirm utility locations, and verify alignment and grades.
Excavate the trench. Control width and depth, install shoring, and manage dewatering.
Prepare the trench bottom. Remove loose or unsuitable material and place the bedding layer.
Lower and align pipe. Use proper lifting equipment and check grade before jointing.
Assemble joints. Follow manufacturer procedures for gasketed, fused, or welded joints.
Place haunch and initial backfill. Compact in thin lifts to specified density.
Complete final backfill. Restore surface and compact in controlled lifts.
Test the line. Conduct deflection, leakage, and CCTV tests as required.
Document as-built conditions. Record pipe invert levels, joint locations, test results, and restoration work.
Commission and hand over. Verify capacity and cleanliness before putting the line into service.
Planning a large-diameter drainage project? Request a technical quotation for an HDPE/PP spiral profile pipe production line configured to your target pipe diameters and installation schedule.
Conclusion
Drainage pipe installation is a structural and hydraulic construction process, not simply a matter of burying pipe. The trench, bedding, haunch, backfill, joints, and testing all determine whether the system performs for decades or fails prematurely.
Key takeaways:
Drainage pipe installation quality depends more on soil-pipe interaction than on pipe material alone.
Bedding and haunch compaction are the most critical factors in controlling flexible pipe deflection.
Trench width, dewatering, and backfill material selection must match the pipe type and project specifications.
Large diameter pipe installation benefits from long pipe lengths, proper lifting equipment, and controlled jointing.
On-site production of HDPE/PP spiral profile pipe reduces logistics risks and supports complex municipal drainage pipe schedules.
Testing and documentation protect both the contractor and the owner at project handover.
If you are planning a drainage pipe installation project or considering in-house production of large-diameter pipe, request a technical quotation. Our engineering team can recommend the right HDPE/PP spiral profile pipe machine for your project and provide installation and commissioning support.
Recently Posted
-
Wastewater Infrastructure Design, Assessment, and Renewal
June 29, 2026In March 2023, a wastewater treatment plant serving 400,000 residents in Southern Europe suffered a cascade failure. A single inte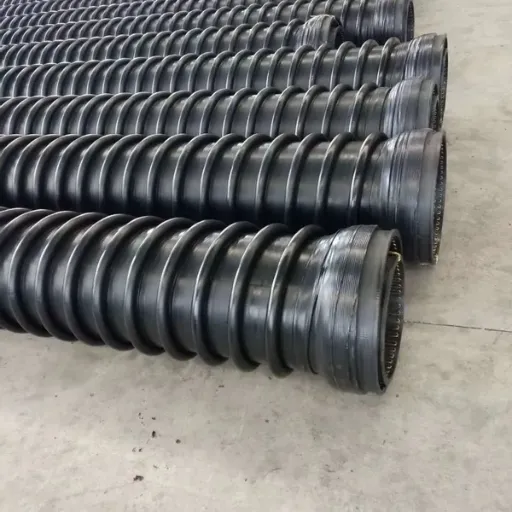 Read More
 -
Combined Sewer System Design, Operation, and Rehabilitation
June 29, 2026In August 2021, a single storm dropped 175mm of rain on a midwestern U.S. city in less than 36 hours. The city's aging combine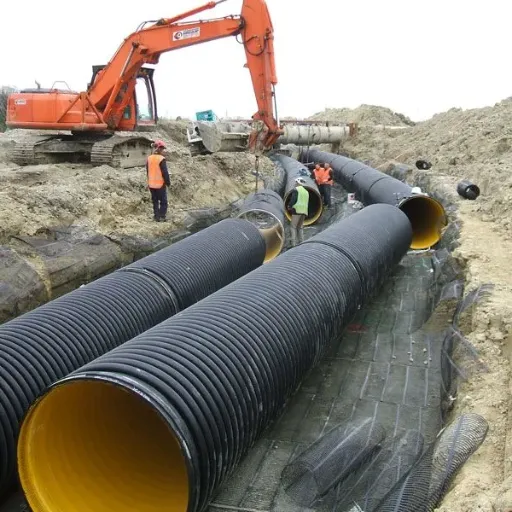 Read More
 -
Underground Drainage System Design: An Engineer's Guide to HDPE/PP Pipe Solutions
June 29, 2026A single storm in July 2023 dropped 180mm of rain on a mid-sized European city in 48 hours. The downtown drainage network, built m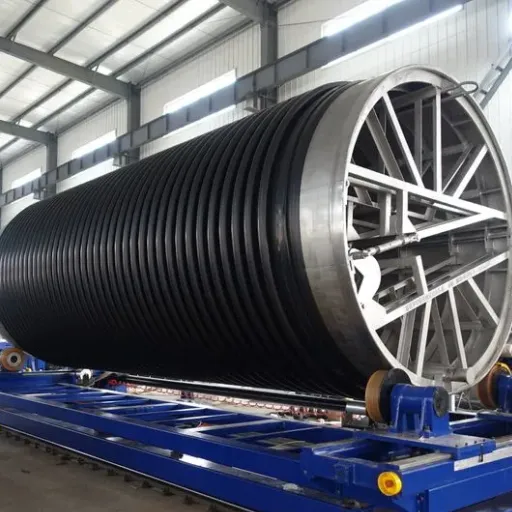 Read More
 -
Drainage Pipe Design: A Practical Guide for Municipal and Stormwater Systems
June 29, 2026In November 2023, a municipal engineer in Texas named Carlos Mendez reviewed plans for a new storm sewer along a commercial corrid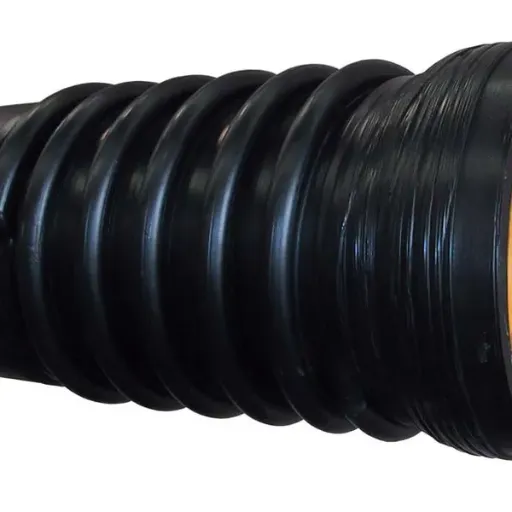 Read More

Contact Us
Recommended Products
-
 CIPP Glass Fibre Liner MachineNegotiableMOQ: 1 Set
 -
HDPE Helically Wound Tank MachineUS$ 10MOQ: 1 Set
-
CIPP Glass Liner MachineNegotiableMOQ: 1 Set
-
CIPP Felt Liner Manufacturing MachineNegotiableMOQ: 1 Set
-
Large Diameter HDPE Sea Intake Outfall Structured Wall Pipe Making MachineNegotiableMOQ: 1 Set
-
UV-CIPP Glass Fibre Liner Manufacturing MachineUS$ 1000 - 110000MOQ: 10 Meters
-
HDPE Pipe Extrusion Machine / PE Pipe Production Line With High OutputNegotiableMOQ: 1 Set
-
UV-CIPP Glass Fiber Liner Hose Production LineUS$ 1000 - 110000MOQ: 1 Set
-
HDPE Spiral Structure Wall Pipe MachineNegotiableMOQ: 1 Set
-
HDPE Spiral Pipe MachineNegotiableMOQ: 1 Set

-
HDPE Spiral Tank MachineNegotiableMOQ: 1 Set
-
Krah Pipe MachineNegotiableMOQ: 1 Set
-
Plastic HDPE PVC PPR Pipe Extrusion Making Machine Extrusion LineNegotiableMOQ: 1 Set
-
PVC Pipe Extrusion Production Line for Electrical Conduit and Water Supply PipesNegotiableMOQ: 1 Set
-
Hot Sell Single Wall Corrugated Pipe Extrusion Line With Competitive PriceNegotiableMOQ: 1 Set
-
HDPE Krah Profild Pipe MachineUS$ 10000MOQ: 1 Set
-
Plastic Tank CNC Holes Boring MachineUS$ 10000MOQ: 1 Set
-
Double Wall Corrugated Pipe Extrusion LineNegotiableMOQ: 1 Set
-
Single Wall Corrugated Pipe Extrusion LineNegotiableMOQ: 1 Set
-
Inversion CIPP Liner Tube Manufacturing MachineNegotiableMOQ: 1 Set